Showing posts with label Yummy Eats. Show all posts

Thursday, November 15, 2012

warm & toasty


Today was a beautiful day. Waking before the sun I got to witness a brilliant orange and red sky as the sun burst forth to sine upon a new day. And though I am not generally an early morning person (before 6am makes me make sad face), watching the breath taking sunrise made it worth every groggy moment. The Fall sun shone bright and warm through windows as we chatted over breakfast and giggled over new lessons; we are learning French with using Beth Manners CD's (fun french for kids and magic french for kids) and it is fun to try to sing along.


Today was a calm day, a cozy day, a moving slow and enjoying each moment day. There was crafting to be done; we started making toilet paper roll race cars. We had a blast but will have to finish them another day because we ran out of cardboard for the wheels. Oops! But no worries. The sun was calling us outside to enjoy sweet rays on our faces and damp earth beneath our bottoms. I sat back across the yard watching my Bodhi play with the chickens and the dirt, allowing him to experience his own thoughts. I wonder what makes him suddenly squeal and make thinking face then suddenly look up and catch my eye as though he knew my thoughts. Such a big little man.


ZOOM! Loki speeds by in his cardboard slice of heaven...a silver race car with turning steering wheel and shifter. It's his pride and joy and I must say it is a nifty little creation. He takes such pride in his crafting and I can't help but smile as he runs past like a box of lightening, a group of chickens in hot pursuit of this darting shimmering creature.


All too soon the air gets chilly and the little islands of sun puddled on the grass get smaller and smaller. Our cue to head in for dinner. A yummy recipe flitted across my facebook today, made by a Mary Bogue, called Broccoli Goddess Soup. It looked delicious but as always I couldn't resist putting my own little spin on it. And wowza! So good I surprised myself. Not a drop of dairy but boy the flavor was just like creamy cheese and broccoli soup. This goes into my little stash of delicious goodies.

Green Garden Goddess Soup

Ingredients:
-1 whole zucchini sliced into circles
-2 red potatoes (1 red 1 yellow) halved and sliced
-1/2 a bunch of kale
-4 cups of broccoli florets
-3 or 4 cloves of garlic left in the skin
-olive oil
-2 cups vegetable broth

Tools: 
-Blender
-Medium Sauce Pan


Directions:
Set the oven to 350 degress. Place the zucchini, potatoes, kale, broccoli, and garlic (still in the skins) onto a cookie sheet and drizzle with olive oil. (I am a liberal user of olive oil and drench more than drizzle at times...go with what looks good to you.) Roast in the oven for 15-18 minutes; or long enough to have the broccoli be just a little tender. The kale will be krispy like kale chips this is okay.Pour the vegetable broth into the blender and place the roasted vegetables into the blender (remember to remove the garlic skin now). Blend until soup is the consistency you desire. I left ours a little chunky. You can heat the soup further on the stove in a sauce pan. Top with seasonal herbs, cheese, or whatever speaks to you. I paired the soup with yummy buttermilk biscuits and topped with cheese and hot sauce.

What a delicious way to end a gorgeous day. 

How do you spend your cozy slow going days?
What yummy meal ends the perfect lovely Fall day for you?

Tuesday, October 30, 2012

apple chip love

We have harvested the last of the apples from the trees.The counters sit filled with apples so red that I keep envisioning Snow White sneaking in to steal a treat. I have so many apple recipes that my head spins and my imagination is full to overflowing with what to do with all these goodies. And while I am delighted by recipes for pies and cakes and breads and unique treats to be made, sometimes it is the simplest treat that catches my fancy the most.

I am forever trying to find ways to make the stuff in life that we need and be far less dependent on the stores or outside sources. My motto is, "if I can make it I can't buy it" (at least not unless I want to support a small farmer or hand crafter that I really admire!). There is nothing more satisfying than making something that you and your family can enjoy. There is a certain pride to be taken from the DIY lifestyle. This time around I made baked apple chips. It is one of the simplest recipe I have made. It requires very little prep time and few ingredients but the end results are very satisfying and delicious!

Baked Apple Chips

What you will need:
An apple corer (I used my peeler and it worked out nicely)
Cinnamon
Nutmeg
Ginger

The steps are easy as pie (actually easier)!
1. Preheat the oven to 250 degrees.
2. Rinse and core the apples.
3.Slice them into thin-ish circles.
4. Put the slices onto a cookie sheet.
5. Sprinkle with the cinnamon, nutmeg, and ginger.
6. Place into the oven and bake for 2 hours (or until the apple chips are the texture you want them); check them at the one hour mark and turn them over so that they bake evenly.
Raise or lower the temperature of your oven as needed to get the best results.


Tuesday, March 13, 2012

lickity split

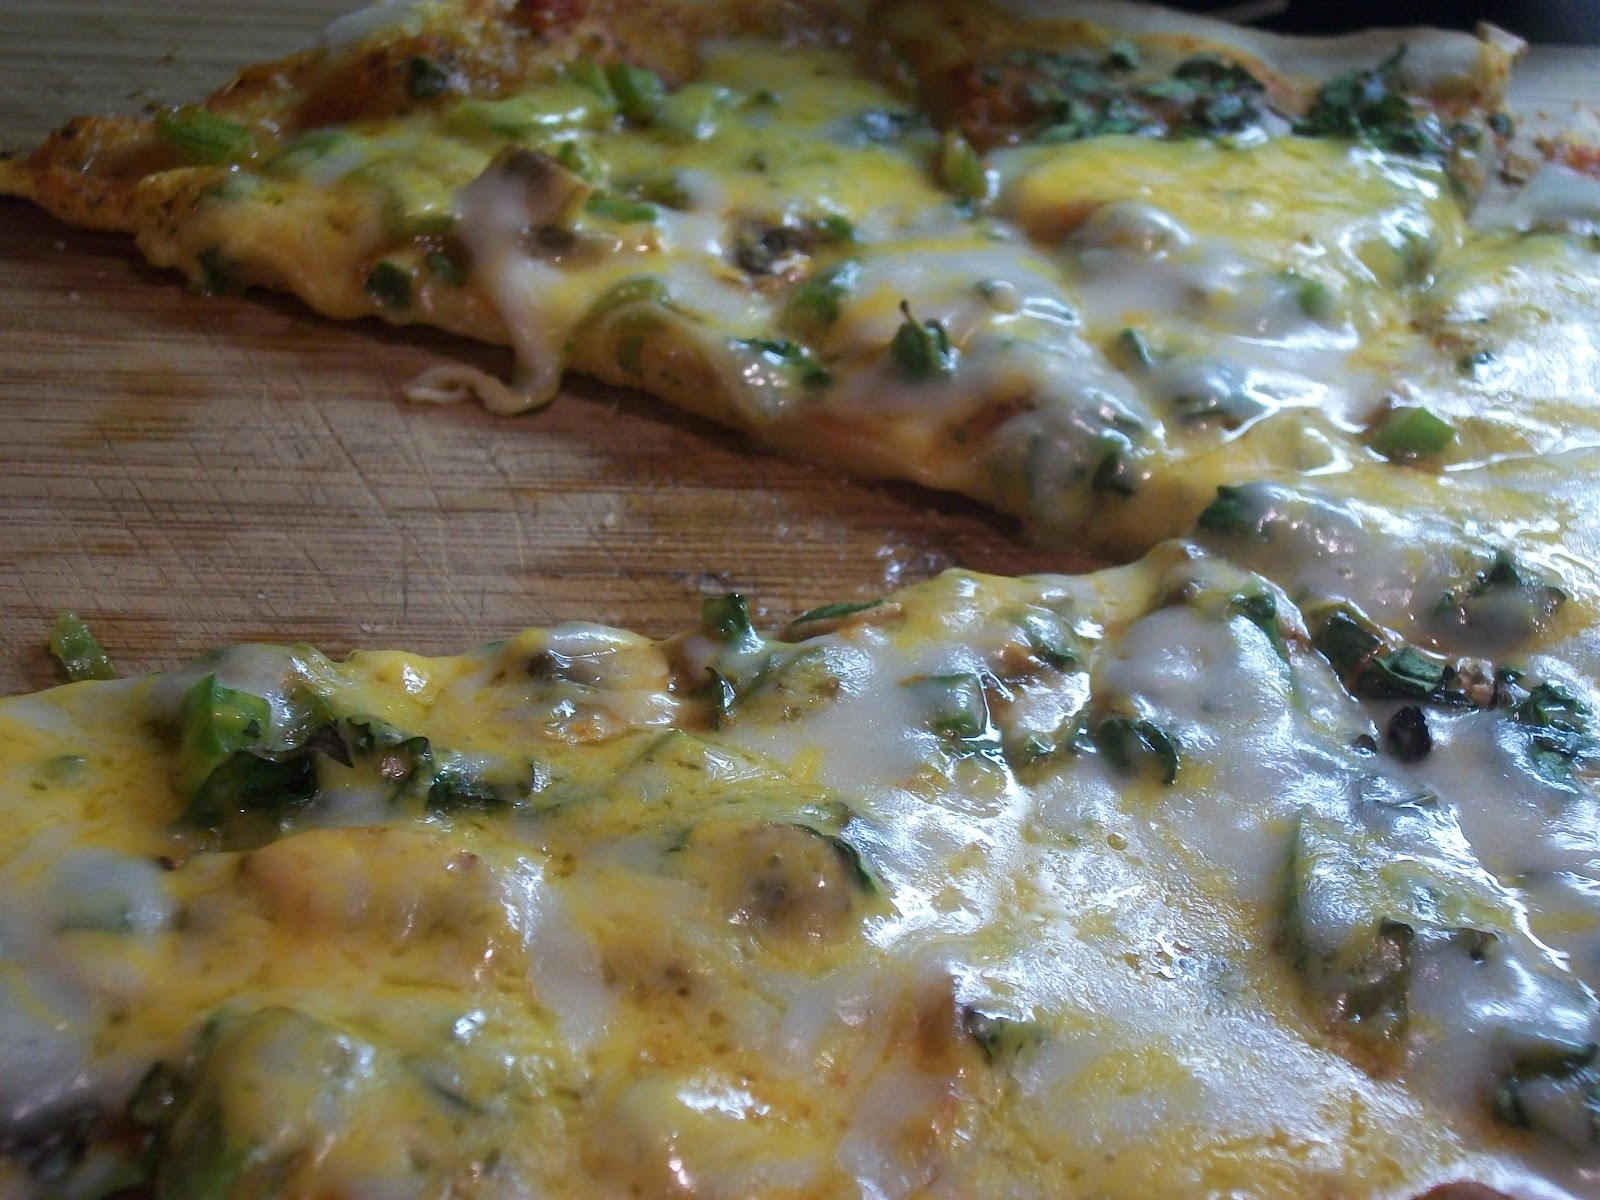
In our house pizza is like gold...we love to eat it and since we don't do so often it is always fun to try a new recipe each time we make it! This one so is by far my favorite if for no other reason than it took me 15 minutes to go from ingredients to dinner! That's what I call fast food!


Super Fast Thin Crust Pizza
Ingredients:
Spinach
Bell Pepper
Mushroom
Garlic
Basil
Any topping that makes your mouth water!
Cheese (I used mozzarella and colby jack but any good melting cheese is perfect)
The crust recipe came from The Kitchn.com
3/4 cup water (lukewarm)
1/2 tsp yeast
2 cups all purpose flour
1/2 tsp salt

Directions:
Heat oven to 500 degrees. Heat water until lukewarm, add the yeast, and stir. Mix the flour and salt in a large bowl. Make a well in the center of the flour and add the yeast mixture. Combine. When the dough becomes cohesive turn it out onto the counter and knead until smooth. It should be moist and a little tacky but not super sticky like bubble gum.  Using two pieces of parchment paper, roll out 1/2 of the ball of dough onto each and top with everything except the cheese. Bake for 5 minutes and rotate. Bake for another 3 minutes (unless the crust is already getting dark) sprinkle the cheese over the top of the pizzas and bake another 2-3 minutes or until the edges of the pizza are golden brown. Bon Appetit!!!

Saturday, March 10, 2012

getting that spring feeling

With this most recent burst of 70 degree days and gorgeous clear skies it has felt like Spring was here in full force. Spring is one of my favorite seasons! The warm breeze filled air carrying sweet smells of trees and gardens in bloom, the fresh vegetables and fruits popping put of the Earth in abundance, and the beginnings of new life all around me bring a special kind of warmth to my heart. As the days start cooling again, in the way they do at the end of Winter, and the rain and frost move back in, I want to keep that warm lovely Spring feeling with me. This hearty Split pea makes me feel warm, cozy, and filled with the yumminess of a Spring soon to come!


Garlic & Ginger Split Pea Soup
Ingredients:
4 cups veggie broth (or chicken broth if you are so inclined)
2 cups water
1 cup chopped spinach
2-3 cups chopped carrots (l like to chop mine small so they cook quicker)
4 cloves garlic minced
fresh ginger (approximately the size of your thumb) chopped
6 green onions chopped
1 cup brown rice
 1 cup split peas (dry)
1 tablespoon sage
1 tablespoon thyme
salt and pepper to taste

Directions: Put the broth, water, split peas, and rice into a heavy bottomed pot; if you don't have a heavy bottomed pot a large pot is just fine. Cover and bring to boil. Once it is boiling reduce the heat to low and let simmer for 35 minutes. Add the carrots, ginger, garlic, and onions and simmer until the carrots are tender (around 15 minutes or so depending on the size of the carrots). Remove from heat and add the onions, spinach, sage, thyme, salt and pepper. Stir until well blended.  

Wednesday, March 7, 2012

fast and yummy

I am a cheesecake fanatic! I have been known to poke s person with my fork (only grown up persons...and gently!) if they try to sneak a bite of my favorite yummy off my plate. I even once sat and ate an entire cheesecake by my self; I know SCANDALOUS! Even more exciting, I have passed my cheesecake love gene onto my 7 year old son...the baby is still on the fence about where his taste buds lie in this department but since he is sooo darn cute, it's ok. My love for cheesecake is often thwarted by the amount of time it takes to make this delectable treat...to make a real, awesome, yummy, fantastic, New York style cake (like the Cake from my oldest boys 7th birthday...in the post Birthdays, Birthdays, and More Birthdays!) can take upwards of 6 hours. But never fear I have found the answer in these palm sized pieces of heaven! No longer will I stare longingly at my cheescake recipe knowing I can not devote the time to fulfill my sweet tooth. Now the problem will be remembering to use moderation in how many times in a month I will make these babies and how many different variations I will try. Cheesecake is so accomodating like that!


Mini Cheesecakes
Crust:
1 cup Cracker Rounds (kinda like ritz crackers but way less disgusting!); I got mine from Trader Joe's
2 tablespoons brown sugar
2 1/2 tablespoons melted butter
1-2 tablespoons agave syrup
Cheesecake:
8 ounces cream cheese; softened (I let it sit at room temperature for 30 minutes)
2 tablespoons greek yogurt
1/3 cup evaporated cane juice or palm sugar (or other natural sugar product)
1 large egg
1 teaspoon vanilla extract

Preheat the oven to 350 degrees. Using a muffin pan, line the cups with paper liners.
In a medium bowl, crush the crackers into crumbs and then mix in the brown sugar. Mix in the melted butter and the agave until the crumb crust takes on a slightly tacky consistency. Place two tablespoons of the crust mixture into each cup and press down evenly.
In a large bowl, mix the cream cheese, yogurt, sugar, egg and vanilla until smooth (I did this by hand with a fork, but for a less lumpy consistency use a hand mixer). Pour the filling onto the crumb crust until the cups are nearly full. If there are any empty cups in the cupcake tin place a small amount of water into each to keep them from scorching. Bake for 25 minutes or until the cheesecakes are firm (you can check this by poking a toothpick into the center ; if it comes back clean than the cakes are finished). Take the cheesecakes out of the cupcake pan and let sit to cool. Simple and delicious; Enjoy!

Monday, February 13, 2012

Sweet Potato Tacos

As I was sitting at the park hashing out what was to be had for dinner...as is done every afternoon in my house...I decided that I had to have sweet potatoes. It was a sudden and demanding craving and one that the family seemed inclined to join me in. What to make, what to make that would be simple and filling and would involve this yummiest of "potatoes"? Well tacos of course!


Sweet Potato Tacos
 Ingredients:
taco filling-
1-2 sweet potatoes; washed and cubed (leave the skin for the vitamins!)
1 green bell pepper; sliced thin
1 medium red onion diced
3-5 cloves of garlic chopped
a decent sized chunk of fresh ginger chopped (remove skin) 
2 tablespoons olive oil (though I use liberal amounts of olive oil)
ground cinnamon
garlic powder
 salt and pepper

Directions:
Cube the sweet potato and steam covered until just starting to get tender. Heat the olive oil in a large skillet or wok add the sweet potato, onion, bell pepper and saute until the onion just starts to get clear around the edges. Add the garlic, ginger and seasoning to taste. Cook 2 -3 more minutes.

Toppings-
Fage plain greek yogurt in place of sour cream (or any other greek yogurt you desire)
green onions chopped
cilantro chopped
black olives sliced
cheese shredded finely ( we used monterey jack but any cheese that makes you happy!)


Tortillas:
Ingredients
31/2 cups all purpose flour
1 cup whole wheat flour
11/2 cups warm water
11/2 cups oil (olive, vegetable, canola, etc)
1 tablespoon baking powder
2 tablespoons salt

Directions:
Mix all dry ingredients; you can add some flair here by adding powdered garlic or any other seasoning. Add the oil and water and mix until the dough has firmed enough to knead. Knead on a flat surface for 3-5 minutes. Break pieces off to form balls. You can do small pieces (the size of  golf balls) for tacos or larger pieces (double that size) for larger tortillas. Place the balls onto a floured surface such as a cookie sheet or cutting board. Cover with a damp cloth and let sit for 3o minutes or so. Flour a flat surface and a rolling pin take one ball at a time and flatten it into a tortilla-esque shape. They may not be perfectly round but I prefer mine funky shaped; gives them character! Heat a skillet on medium high heat and place the flattened dough onto the skillet (no oil is required). As the one is cooking you can begin to flatten another. Flip the tortilla when the first side has started to get a little color (some spots will start to brown lightly). Place the cooked tortilla onto a plate (or a tortilla basket should you have one) and cover to keep warm. Continue to do this stacking the tortillas on top of each other (they don't stick) until finished. Fill with your favorite toppings, or leave it empty, and chow down!
Sorry about the foggy pictures, I failed to notice the baby fingerprints on the lens until this morning. He is another budding photographer!

Monday, February 6, 2012

cookies and costumes

This is it it has finally happened! "What, you might ask, has happened?" Well if you must know...my youngest little one has discovered the joy filled world of dress up! "Oh, is that all?!", you might say. But this is a momentous occasion for a little person. It means that not only are they coming into their own as a person but they are expressing their sweet little individuality in the costumes they pick when dressing up. It is a window into their imagination. In picking a costume it is like they are saying, "Who or what will I be today?" They become the creatures or people that these costumes represent embodying movements, sounds, postures the whole kit and kaboodle. And to me this is exciting and beautiful. And so what better way to celebrate than with a batch of cookies!
 Loki's photography of mom
 Can't believe he is only 7!
 Loves experimenting with the zipper

 Painfully cute!!!!
 Rooooaaaaarrrrr!! He's a dragon!

White Chocolate Coconut Cookies
Ingredients:
1 cup brown sugar
1 stick butter (1/2 cup)
1/4 cup coconut oil
1 large egg
1 tsp vanilla
1/2 cup milk
2 3/4 cups all purpose flour
1/2 tsp baking soda
1/2 tsp salt
1 cup coconut
1 cup white chocolate chips

Directions:
First, blend the butter, coconut oil, and sugar together. Next, add the egg and vanilla and mix until mostly smooth. Then, add the flour, salt, baking soda, and milk and stir until well mixed. Finally, add in the chocolate chips and the coconut and blend. Preheat the oven to 350 degrees. Measure out heaping teaspoons of the batter into balls and flatten them slightly onto the cookie sheet (you can line the cookie sheet with parchment paper but it isn't a requirement as these cookies don't tend to stick) and bake for 15 minutes or until the cookies are light brown on the bottoms. Let cool or enjoy right out of the oven. 

Sunday, January 15, 2012

White Chocolate Blueberry Brownies


White Chocolate Coconut Blueberry Brownies with Peppermint Whipped Cream

The Brownies...
Ingredients:
11/3 cups all purpose flour
1 teaspoon salt
11 ounces white chocolate chips (1 bag)
1 cup unsalted butter (2 sticks)
11/2 cups evaporated cane juice or palm sugar
1/2 cup brown sugar (packed)
5 eggs at room temperature
2 teaspoons vanilla
1 cup shredded coconut 
1 cup  blueberries (or more as desired, fresh or frozen)

Directions:
Preheat the oven to 350 degrees farenheit. Butter a 9x13" pan and set aside. Melt the butter and chocolate in a double boiler (or a ceramic bowl over boiling water being careful not to get the contents of the bowl wet).When it is completely melted, turn it off and scrape contents into a larger bowl. Mix the sugars and stir until well blended. Add 3 eggs and mix. Add the remaining eggs and the vanilla and mix. Pour the flour and salt mixture, the coconut, and the blueberries into the chocolate mixture and gently stir until well combined. Pour the mixture into the buttered pan, place in the oven, and bake for 40 minutes or until the top is lightly browned and a tester (toothpick or knife) poked into the center of the brownies comes out clean. Cut and enjoy.

The Peppermint Whipped Cream...
Ingredients:
1 small container of heavy whipping cream (larger if yo wish to make lots of whipped cream)
1 tablespoon evaporated cane juice, light agave, or palm sugar
2 drops peppermint extract

Directions:
Put the heavy whipping cream, the evaporated cane juice (or agave or palm sugar), and the peppermint extract into a blender. Blend on medium until the whipping cream forms peaks (becomes stiff enough to scoop). Scoop large dollops onto the brownies (and into your mouth) and enjoy!